 If you are using Office 2010 you might have frequently come up on something called “Protected View”. This is a security feature which Microsoft has added to Office so that infection does not enter you computer while opening unknown documents or outside documents. But this can be a little itchy for you if you are regularly using Office documents. So in this post I will explain you how to disable it (Note: if you are so frequent user then its better to keep this security feature.)
Here in this post I will explain how to remove this feature from Word 2010, well you need to follow the same steps for Excel, PowerPoint etc.
- Open a new Office Word 2010 document and click on File button on top.

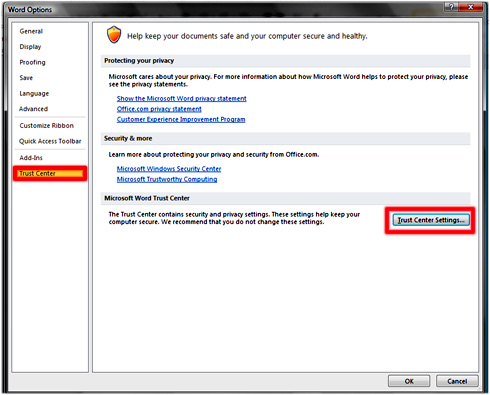
- Select Options from the list.
- From the left list select Trust Center.

- On the right side uncheck the “Enable protected view for files …”

Well what more you can also specify protected view for each section, like suppose you want safety feature to remain for all files from public internet, check the first option etc.
Hope it helped, do comment. 🙂

alta
May 05. 2011
I have no “protected view” in that menu. Now what?
sk
May 06. 2011
well this options is not always there,it comes under certain conditions. I hope you read the article.