Wireless Printer Setup :Confirm Printer, Router and PC are Wireless Compatible.
Before you begin to set up a wireless printer network, you should be sure that all of your equipment is compatible and that you have the right hardware. Many older printers are not capable of connecting wirelessly, and new printers may not work with older computers. Additionally, desktop computers may need to be plugged into your router to connect to your wireless printer unless you have a wireless USB networking card installed in your PC. Once you are sure that you have all of the proper equipment, you can move on to step two.

1) Connect Your Router to Your Modem
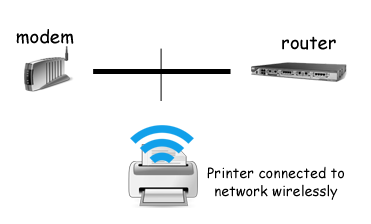
If you are like most people, you will want your computers to be able to get on the Internet through your wireless connection. To do so, you will need to plug your router into your cable or DSL modem. From there, you can physically connect any devices that require Ethernet cords into one of the four available ports on your wireless router. Your wireless router should have an installation disk that will walk you through getting your router and modem to communicate with each other.
2) Configure Your Wireless Settings
Once your router and modem are communicating and letting physically connected devices to go online, you will also want to configure your wireless settings and enable security options. If you do not secure your wireless router, anyone in range of your network can connect to it and may be able to access files on your computers and data transferred over your network. During the wireless configuration process, you will choose a network name that your devices will connect to and a wireless passphrase that will only allow you and people in your household to connect to your network.
3) Wireless Printer Setup:Install Drivers on Your Computers
Depending on the type of Wireless printer that you have, this may not be necessary, but some wireless printers require you to connect them to a computer to be able to input wireless settings. You will simply need to connect your printer to a computer using a USB cord and run through the printer’s installation disk. If there is a program required to configure wireless printer settings on your printer, it will be installed at this point.
4) Connect Your Printers to the Wireless Network
If you have already installed your printer’s software, you will simply go through the software’s setup wizard to input your wireless network name and passphrase. However, there are a number of new printers that do not you require to physically connect them to a computer to configure them. If this is the case, you will simply need to find a “Setup” or “Configuration” button on your printer. From there, locate the “Wireless” or “Network” menu and follow the prompts to put in your wireless settings. You can learn more about wireless printer at Dell.com
5) Connect Your Wireless Printer to Your Computers via Your Wireless Network

Once your wireless printer has connected to your wireless network, you can then set your computers to connect to it via your network. In most Windows computers, this is accomplished by going to your Control Panel and choosing to Add A Network Printer. You may need the Wireless printer installation disk to install the software for the printer, but as long as your computer and printer are both connected to your network, this is a fairly quick and automated process.
Liked our article? Do comment and Subscribe us (use the Green box below) so that you don’t miss any of our important tips and tweaks.
Author Bio: David works with Dell. He enjoys all things technology related. Right now he is very interested in print solutions. You can learn more here. When not working he enjoys hiking, reading and writing about technology.
