Windows older versions like Windows XP gave you option for editing the boot menu. This feature was quite handy when you multiple operating systems installed in your pc. But once you are in Window 7 this option has simply been removed by Microsoft. (Don’t know why??).
I had recently faced a situation where I installed multiple Windows 7 on my laptop (Home Premium and Ultimate versions), but while booting I could only see 2 entries with same name “Windows 7”. This can be confusing at times so I planned to edit my boot menu so and add the version of Windows. But unfortunately I could not find Windows built-in feature which could help me.
In this post I will explain about a free and super simple application which helps you edit your boot menu on Windows 7 and many more.
Editing the Boot menu on Windows 7 with EasyBCD:
- First you need to download EasyBCD (free for non-commercial use) .[ Download link: EasyBCD ]
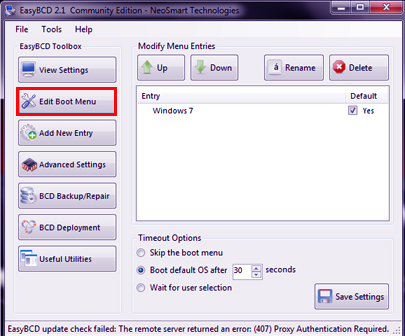
- Launch EasyBCD by clicking it.
- From left side of the window select “Edit Boot Menu” button.

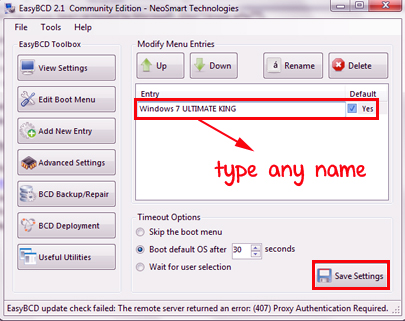
- Now on the left pane you will find the Boot entries, (Installed OS details).You can double click on the entry and rename them. Once done just click “Save Settings” and that’s it.

EasyBCD has much more powerful features which I will be explaining in future posts.
Hope this helped,do comment. 🙂
Subscribe To Get FREE Tutorials!
